Star Force
Last Updated: 16 December 2024
On this page
Star Forcing
Star Forcing is done when all upgrade slots on an item are used up.
You access the Star Force upgrade interface by:
- Using the
 keyboard shortcut, or
 - Clicking the
 red hammer icon at the bottom of your inventory
Click and drop the item to upgrade within the interface. Star Forcing costs mesos and will cost more at higher equipment / enhancement levels.
The star forcing process
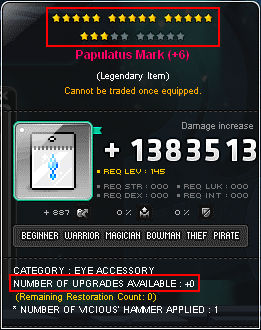
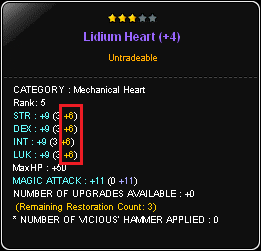
Stats received from Star Force are displayed in orange.
Certain scrolls allow you to skip the Star Force process.
Name
Function
<X> Star Enhancement Scroll
- Makes an item X*
- Comes in 2, 3, 4, 5 star variants
- Works only on items at 0*
(Advanced) Equipment Enhancement Scroll
- Adds 1* to an item up to 15*
- Destroys item if scroll fails and does not leave an item trace
High Quality Equipment Enhancement Scroll
- Adds 1* to an item up to 15*
<X> Star Force Enhancement Coupon
- Makes an item X*
- Cannot be used on Superior equipment
- Often comes with level restrictions (usable up to a certain equipment level)
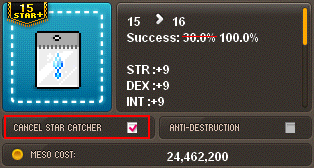
Star Catch
When enabled, each starring attempt activates the Star Catcher minigame. Tap spacebar (or click stop) to "catch" the star within the highlighted region. Successfully catching the star gives you a 4.5% multiplicative increase to the success rate (e.g. if the original rate was 30% success, you get 30 * 1.045 = 31.35% chance of success instead).
Star Catcher's difficulty increases by one stage after 20 star attempts (regardless of whether or not Star Catcher was active). Its difficulty decreases by two stages every 10th minute (i.e. :10, :20, etc.).

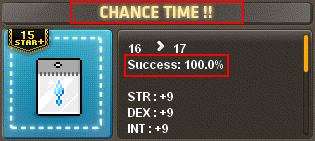
Failing Star Force
If you fail two consecutive starring attempts, you get Chance Time, which grants you 100% success rate for the next attempt on that item. Chance Time disappears if you star other items before using it, or if you did not use it within 5 minutes.
Star Force comes with certain risks at higher enhancement levels.
Equipment Type
Chance of Losing 1 Star
Chance of Item Destruction
Regular Items
Chance of losing 1 star at 16* onwards; safety at 20*
Chance of item destruction at 15* onwards; falls to 12* when destroyed
Superior Items
Chance of losing 1 star at 1* onwards; no safety
Chance of item destruction at 5* onwards; falls to 0* when destroyed
Item Destruction
Items destroyed during starring leaves an item trace, which can be restored using a duplicate of the same item. Items with the same name but with fixed potentials / Star Force (usually from events) are not valid duplicates. During the restoration process, item traces will transfer all properties (potentials, flame stats, etc.) to the new item.


You can select the Anti-Destruction option for Regular equipment at 15* > 16* and 16* > 17*, at the cost of double mesos.